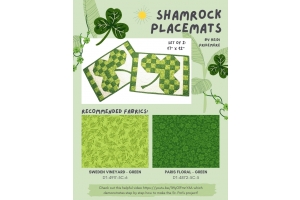
It’s that time of year again! The morning is busy, busy again and the ever-long sun shining day is getting a tad shorter. We know what that means: back to school! Yes let’s take a moment to mourn that the summer season is coming closer and closer to a close, but let’s all get excited that school is (almost) back in session! And with that, let us intro the cutest little lunch bag ever with a matching pencil pouch for the kiddo’s backpacks. Best of all, you can whip out these two projects in a little over an hour. Here’s what you’ll need total for both projects:
These pattern pieces. We will refer to them by number.
1.5 Yards of your Punks & Roses fabrics (or any David Textiles fabulous fabrics!)
½ yard vinyl in the color of your choosing (we chose white & used a linen as we did not have vinyl on hand, but this is for illustration purposes)
1-2-inch piece Velcro
1-8-inch zipper
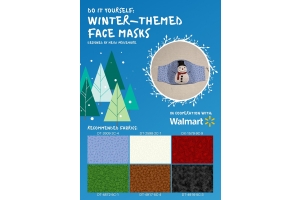
 Look it's a pocket !
 Grab the bottom #3 fabric pieces and, holding them right sides together, zig-zag stitch them to hold them in place, leaving a small opening where you can turn the fabric right side out. After you have turned it right side out, topstitch the opening closed. The bottom of your bag is now assembled.
Gather two of your #4 fabric pieces and holding them, again, right sides together, zig-zag stitch down the long sides only. Turn right side out. Repeat for the rest of your #4 fabric pieces. When you are done, you should have 4 1-inch wide tubes. These will be your loop holes because you will sew them folded in half (later).
Pin the front and back of the backpack to the bottom of the lunch bag and stitch in place using a single needle stitch with the stitch length the smallest it can go.
Then, sew up the side seams, inserting your loop holes on the top and bottom corners of the bag as you sew. Use a small zig-zag stitch and sew these in tight. We want them to be sturdy!
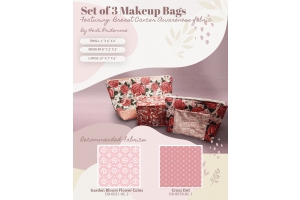
Loops should look like this once sewn in:
Grab the bottom #3 fabric pieces and, holding them right sides together, zig-zag stitch them to hold them in place, leaving a small opening where you can turn the fabric right side out. After you have turned it right side out, topstitch the opening closed. The bottom of your bag is now assembled.
Gather two of your #4 fabric pieces and holding them, again, right sides together, zig-zag stitch down the long sides only. Turn right side out. Repeat for the rest of your #4 fabric pieces. When you are done, you should have 4 1-inch wide tubes. These will be your loop holes because you will sew them folded in half (later).
Pin the front and back of the backpack to the bottom of the lunch bag and stitch in place using a single needle stitch with the stitch length the smallest it can go.
Then, sew up the side seams, inserting your loop holes on the top and bottom corners of the bag as you sew. Use a small zig-zag stitch and sew these in tight. We want them to be sturdy!
Loops should look like this once sewn in:
 Go to your #5 fabric pieces. Fold them in half lengthwise so the wrong side of the fabric is visible and single needle stitch all the way down the long side and one of the short sides. Turn right side out from the only opening. Top stitch the opening shut. You should now have two tubes which are the straps.
Put each through one of the loops located on the bottom of the bag and top stitch in place using the smallest stitch your machine allows. Again we want this to be sturdy to be able to hold our kid’s lunch!
Go to your #5 fabric pieces. Fold them in half lengthwise so the wrong side of the fabric is visible and single needle stitch all the way down the long side and one of the short sides. Turn right side out from the only opening. Top stitch the opening shut. You should now have two tubes which are the straps.
Put each through one of the loops located on the bottom of the bag and top stitch in place using the smallest stitch your machine allows. Again we want this to be sturdy to be able to hold our kid’s lunch!
 Put the other sides of your straps through the top loops of your bag and tie through in a knot. This will make it adjustable.
Locate your long forgotten #6 pieces. Sew those pieces right sides together, leaving a small opening to turn it right side out. Topstitch the entire piece which will effectively sew the small opening closed at the same time. This is now your flap.
Put the other sides of your straps through the top loops of your bag and tie through in a knot. This will make it adjustable.
Locate your long forgotten #6 pieces. Sew those pieces right sides together, leaving a small opening to turn it right side out. Topstitch the entire piece which will effectively sew the small opening closed at the same time. This is now your flap.
 Insert the straightest edge of the flap in between the vinyl and the outer fabric of the back fabric piece. Sew in place using a single needle topstitch on the smallest stitch your machine allows. Continue the topstitch to the front side of the backpack as well.
 At this point you can be done, or you can add a piece of 2-inch Velcro to the inside flap and front of the backpack to keep it better closed.
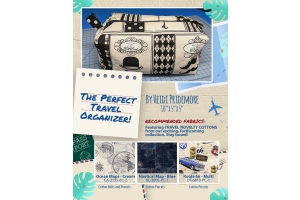
 Yay, Lunch Bag!
For the pencil pouch, things will go much faster-and it’s a good way to use up some scraps! You can make it with a single layer or double up the layers to make it sturdier like we did as pictured with the white fabric inside. Totally up to you!
Grab your #2 fabric pieces. Fold down a ¼” seam allowance on one of the long sides of each of the fabric pieces and iron down. Sew in your zipper in this area using a topstitch. After the zipper is in, you have created the front of the pencil pouch.
Yay, Lunch Bag!
For the pencil pouch, things will go much faster-and it’s a good way to use up some scraps! You can make it with a single layer or double up the layers to make it sturdier like we did as pictured with the white fabric inside. Totally up to you!
Grab your #2 fabric pieces. Fold down a ¼” seam allowance on one of the long sides of each of the fabric pieces and iron down. Sew in your zipper in this area using a topstitch. After the zipper is in, you have created the front of the pencil pouch.
 Grab the #1 fabric piece and sew it to the front fabric pieces that became one peice when you sewed in the zipper. Sew these right sides together, leaving a small opening so you can turn it right side out.
 Turn right side out and then top stitch all around the pencil case, effectively sewing the small opening closed at the same time.
Viola, you’re done!
What do you think of this lunch bag/ pencil pouch combo? Easy Peasy? We think it’s adorable! And oh-so-verstile, as you can easily make the lunchbag dimensions bigger and make a full on backpack, or make the pencil pouch dimensions bigger and make a make-up pouch instead. The possibilities are endless, and the cleanup EASY since we used Vinyl for the lining! Will you try this DIY out? Let us know in the comments and show us your creations on Facebook or Instragram using #ILOVEDAVIDTEXTILES We may just feature you!
Pinterest is the world’s catalog of ideas. Find and save recipes, parenting hacks, style inspiration and other ideas to try.
Turn right side out and then top stitch all around the pencil case, effectively sewing the small opening closed at the same time.
Viola, you’re done!
What do you think of this lunch bag/ pencil pouch combo? Easy Peasy? We think it’s adorable! And oh-so-verstile, as you can easily make the lunchbag dimensions bigger and make a full on backpack, or make the pencil pouch dimensions bigger and make a make-up pouch instead. The possibilities are endless, and the cleanup EASY since we used Vinyl for the lining! Will you try this DIY out? Let us know in the comments and show us your creations on Facebook or Instragram using #ILOVEDAVIDTEXTILES We may just feature you!
Pinterest is the world’s catalog of ideas. Find and save recipes, parenting hacks, style inspiration and other ideas to try.
Instructions
First, cut out all pattern pieces as per the instructions of each pattern piece. Don’t forget to add in the seam allowance of your choosing prior to cutting them out of your fabrics. We like a ¼” seam allowance. Looking at your #2 fabric pieces, lay one of your outer fabric pieces and one of your lining (vinyl) pieces right sides together. Zig-zag stitch them down the long sides & bottom only to keep them in place. Turn right side out from the top. Repeat for the remaining #2 pattern pieces. You now have the front and back of your lunch bag assembled. Holding your #1 fabric pieces together, zig-zag those right sides together leaving an opening to turn it right side out. Lay the front of the backpack right side up. Lay your #1 fabric piece anywhere you please on the front of the lunchbag. Top stitch in place along the sides and bottom, effectively sewing the small opening where you have just flipped it right side out. Your pocket is now done!
Look it's a pocket !
Grab the bottom #3 fabric pieces and, holding them right sides together, zig-zag stitch them to hold them in place, leaving a small opening where you can turn the fabric right side out. After you have turned it right side out, topstitch the opening closed. The bottom of your bag is now assembled.
Gather two of your #4 fabric pieces and holding them, again, right sides together, zig-zag stitch down the long sides only. Turn right side out. Repeat for the rest of your #4 fabric pieces. When you are done, you should have 4 1-inch wide tubes. These will be your loop holes because you will sew them folded in half (later).
Pin the front and back of the backpack to the bottom of the lunch bag and stitch in place using a single needle stitch with the stitch length the smallest it can go.
Then, sew up the side seams, inserting your loop holes on the top and bottom corners of the bag as you sew. Use a small zig-zag stitch and sew these in tight. We want them to be sturdy!
Loops should look like this once sewn in:
Go to your #5 fabric pieces. Fold them in half lengthwise so the wrong side of the fabric is visible and single needle stitch all the way down the long side and one of the short sides. Turn right side out from the only opening. Top stitch the opening shut. You should now have two tubes which are the straps.
Put each through one of the loops located on the bottom of the bag and top stitch in place using the smallest stitch your machine allows. Again we want this to be sturdy to be able to hold our kid’s lunch!
Put the other sides of your straps through the top loops of your bag and tie through in a knot. This will make it adjustable.
Locate your long forgotten #6 pieces. Sew those pieces right sides together, leaving a small opening to turn it right side out. Topstitch the entire piece which will effectively sew the small opening closed at the same time. This is now your flap.
Insert the straightest edge of the flap in between the vinyl and the outer fabric of the back fabric piece. Sew in place using a single needle topstitch on the smallest stitch your machine allows. Continue the topstitch to the front side of the backpack as well.
At this point you can be done, or you can add a piece of 2-inch Velcro to the inside flap and front of the backpack to keep it better closed.
Yay, Lunch Bag!
For the pencil pouch, things will go much faster-and it’s a good way to use up some scraps! You can make it with a single layer or double up the layers to make it sturdier like we did as pictured with the white fabric inside. Totally up to you!
Grab your #2 fabric pieces. Fold down a ¼” seam allowance on one of the long sides of each of the fabric pieces and iron down. Sew in your zipper in this area using a topstitch. After the zipper is in, you have created the front of the pencil pouch.
Grab the #1 fabric piece and sew it to the front fabric pieces that became one peice when you sewed in the zipper. Sew these right sides together, leaving a small opening so you can turn it right side out.
Turn right side out and then top stitch all around the pencil case, effectively sewing the small opening closed at the same time.
Viola, you’re done!
What do you think of this lunch bag/ pencil pouch combo? Easy Peasy? We think it’s adorable! And oh-so-verstile, as you can easily make the lunchbag dimensions bigger and make a full on backpack, or make the pencil pouch dimensions bigger and make a make-up pouch instead. The possibilities are endless, and the cleanup EASY since we used Vinyl for the lining! Will you try this DIY out? Let us know in the comments and show us your creations on Facebook or Instragram using #ILOVEDAVIDTEXTILES We may just feature you!
Pinterest is the world’s catalog of ideas. Find and save recipes, parenting hacks, style inspiration and other ideas to try.